Curious about how to make pottery and maybe do it in the comfort of your own home? We’ve compiled this complete guide for you, if you’re new to the pottery wheel or just took your first wheel throwing class and want to keep going in your own space.
Just follow these instructions step by step, and you’ll be throwing pots like a pro in no time.
Make Your Own Pottery at Home in 7 Steps
There’s a lot to know about how to make pottery at home. We break down the process here for you, from picking your materials all the way to glazing and decorating.
Step 1. Plan what to make on a pottery wheel
Creating a plan for your pottery piece is essential because it will help guide your design process and ensure that your finished piece will fit in the kiln. If this is your first time making pottery, consider making something simple like a bowl or a mug.
First, make a drawing of what you want your pottery to look like. Think of what colour, shape, or pattern would fit in well with the other items in your house. This will help you to envision exactly how big each part of your design should be before you even start on any actual clay work, as well as what kind of clay and glazes to use during the finishing step.
Step 2. Gather all the supplies you will need
You can find clay, tools, and other pieces of equipment at most local arts and crafts stores. If you are looking at making a specific type of pottery, such as functional ware or decorative pieces, you can visit an art supply store.
If you’re only starting out, the good news is you won’t need a lot of tools or equipment. With the right techniques, you can make beautiful pieces even with just a bowl gouge and a rubber mallet. But at some point, you may want to get your own potter’s wheel, slip roller, moulds, bowl cutter, bandsaw, and other tools, so you can expand your range of pottery skills.
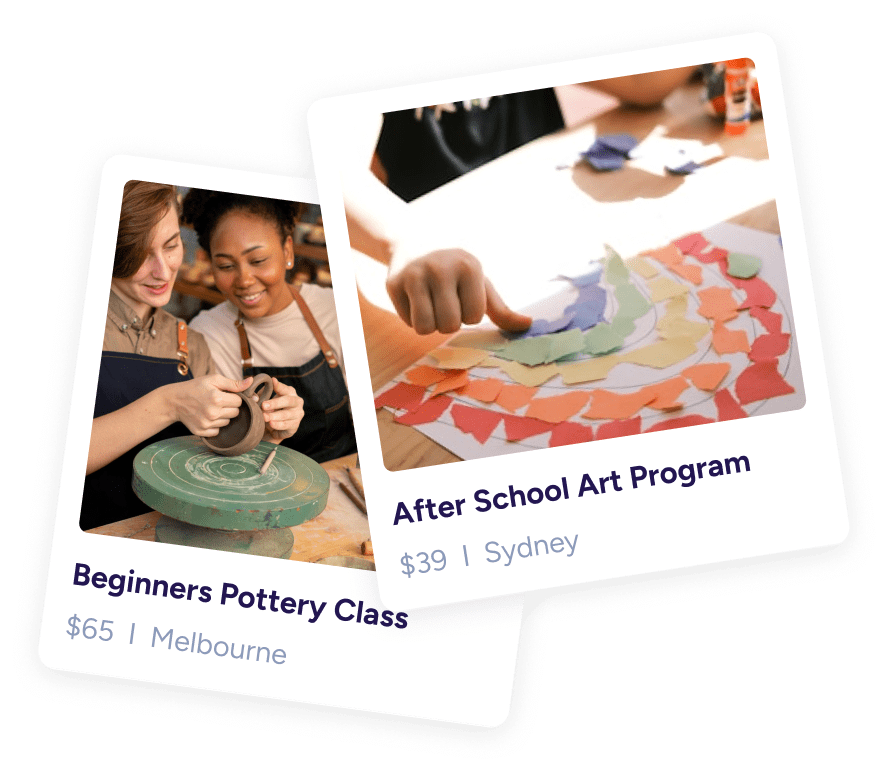
If you are unsure about this step, consider taking pottery classes at a nearby school, like Tennyson Studio in Sydney. Led by their Managing Director Ticky Sakiris, Tennyson specialises in handbuilding and ceramic painting. If you are looking for unique ideas to celebrate special occasions or company events, they also accept private bookings.
Most pottery schools will teach you everything from how to sculpt forms out of clay to how to decorate them with paint or glaze before firing them in the kiln. You can also get tips from pottery teachers on where to buy clay for pottery and other supplies you might need; they may even sell supplies so you can continue to work on your pieces at home.
Step 3. Find the right working space for pottery making at home
Is there an area in your home that has enough space for working with clay on a regular basis? This can be any room in your house or even outdoors, if there’s enough space for it. Moreover, an outdoor venue will prevent fumes from the kiln from building up in your home.
Whether indoors or outdoors, it is best to choose a location where there won’t be much traffic from other family members or guests so you can work in peace without much distraction. Your working space should have plenty of natural light and ventilation so that it doesn’t get too hot or humid while working on your project. A well-lit area also makes it easier to see any imperfections in the clay before firing.
Ideally, it should be an area that is large enough for you not only to work on your piece but also to make room for it after firing, so that you can place it under its own weight until cool enough for handling. This will help prevent warping.
Step 4. Try throwing on the wheel
When first learning how to make pottery, you don’t have to be an artist or have a trained eye. If you’re just starting out, Ticky suggests trying to master hand building first, since you just need your hands and a piece of clay. Pinch pots are a fun way to get your feet wet.
As soon as you’re ready, learning how to throw pottery at home can be a fun and rewarding experience, but it might take some practice to get the hang of it. Here are the main steps for how to do it:
-
Start by wedging your clay, pressing the edges until all the sides are flattened. This will help to soften it and make it more pliable.
-
Next, roll your clay into a ball and begin to knead it with your hands. Keep the clay moving around so that it doesn’t stay in one place and get too hard.
-
Once your clay is ready, centre it on the wheel with your hands or a bat – that’s the flat disk found at the head of your pottery wheel – then lightly tap the clay. This will help your clay settle into your desired form.
-
Once the clay is formed, start turning the wheel. As you turn the wheel, use your fingers or a tool to shape the clay into its final form.
-
Keep turning the wheel until the clay is dry enough to hold its shape.
-
Add your favourite colour dyes, food colouring, or water to the clay and mix it with your hands until the mixture is smooth.
Step 5. Decorate your pottery piece
The possibilities are endless when it comes to decorating a pottery piece. We list some ideas here for making beautiful pottery.
For example, you can paint the piece with a brush, dip it in glaze and then use a sponge or rag to smooth the surface and blend the colours together. The technique is similar to decorating a cake with frosting. If you want an intricate design, consider using stencils or stamps. Some potters like to use their fingers to make lines and swirls in the glaze as it dries.
Another idea is to use a tool called a scriber (or scratch wheel) which looks like a small metal wheel with tiny teeth on one side that leave marks when dragged across the wet surface of the pottery. If you’re looking for something that will last longer than just a few days or weeks, this is where you’ll want to invest in an airbrush kit or similar tool.
Step 6. Glaze your pottery piece
Now that your piece has been decorated, it will be fairly hard and strong, but it will also be very porous. Glazing your piece will help protect it.
Glazing is a process of applying a thin coating of liquid clay onto the surface of the pottery. The purpose of glazing is twofold: first, it seals the porous surface of your pottery and makes it waterproof; second, it provides an attractive finish to your piece.
Glaze comes in many colours and textures, which can be applied in thick layers for an opaque finish or in thinner layers to create more subtle tones. Most clay artists use at least two layers of glaze: one on the surface and one inside the object itself.
The best glaze for beginners is probably the liquid kind, simply because they’re easier to use and simply applied like paint. When you have gained more experience working with clay and want something different, try wax-based glazes. They tend to have more interesting effects than other types of glazes.
Step 7. Fire your clay in the kiln
Once you are satisfied with your piece’s shape, texture, and design, at last, it is time to fire it in a kiln. A kiln is a gas, electric or wood- or coal-fired device that fires pottery and other ceramic items at a specific temperature for a certain length of time. Most pottery studios, pottery schools, ceramics stores, kiln sharing spaces, or other pottery facilities offer kiln services.
AN IMPORTANT REMINDER: Make sure that your piece is completely dry before it goes into the kiln, or else it will crack and break. Drying can take a few hours to several days, so plan your project accordingly. Also check that there are no sharp edges or cracks because they could cause pieces to break further during firing cycles or even come apart completely. A tip: You will notice a change in the colour of the clay, which signals that it can finally go into the kiln.
While each piece will be slightly different based on its size and composition, the firing process will usually take approximately 12 hours at the right temperature (between 1020 to 1200 degrees), which means you can’t use just any old home oven. Should you want to set up your own kiln and learn how to fire pottery at home, make sure to consult with a professional, instead of attempting this step on your own. Not only can a kiln be expensive to build; more importantly, gases released in the firing process can be dangerous to the health.
Just because you’re a beginner in pottery doesn’t mean your finished product can’t look like it came right out of a professional’s workshop. If you follow along with our article, then you should be able to make a beautiful art piece for yourself without too much trouble. Most importantly, remember the fun behind creating your own masterpiece!