Whether you’re a crafty parent or just looking for some engaging kids craft ideas to keep the little ones busy, we’ve got you covered. In this guide, we’ll dive into five simple, spooky season crafts that you can whip up at home using everyday materials. From playful ghost garlands to crafty pumpkin painting and DIY trick-or-treat bags, these projects are perfect for celebrating Halloween together as a family. So, gather your supplies, roll up your sleeves, and let’s embark on some delightful DIY Halloween projects that will spark creativity and bring joy to your home.
Spooky Ghost Garlands
Materials You’ll Need for Garlands
To create your spooky ghost garlands, you’ll need a few simple materials that you probably already have at home. Here’s what you’ll need:
- White tissue paper or gauze
- Black felt or construction paper
- String or twine
- Scissors
- Glue or tape
- A marker or googly eyes (optional)
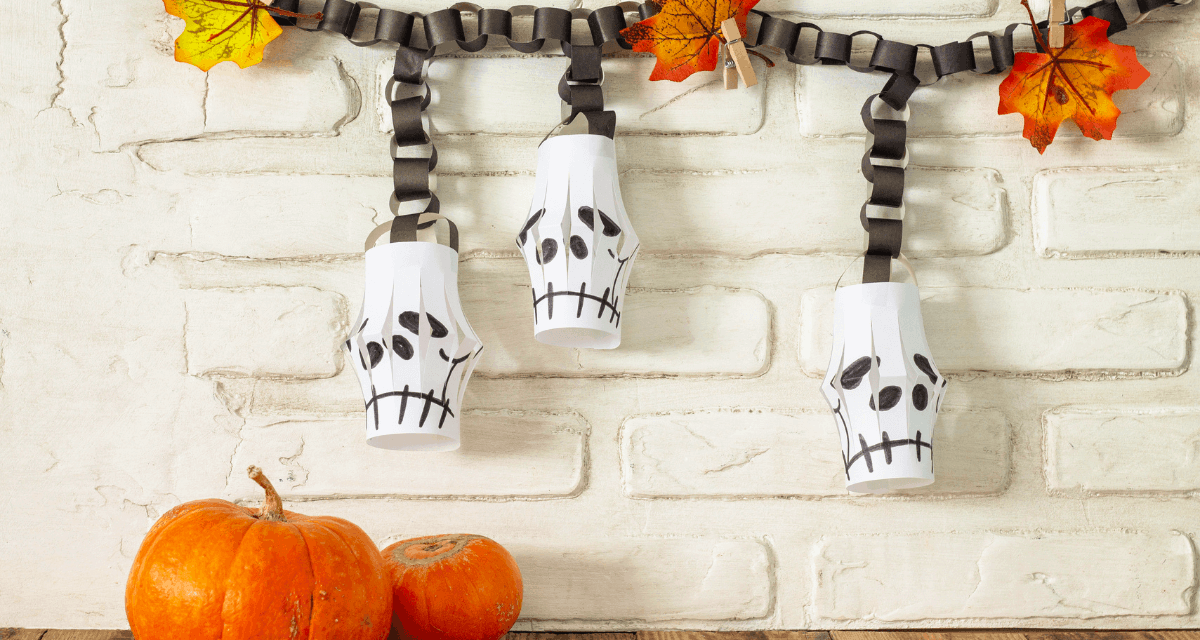
First, cut the tissue paper or gauze into squares or circles to form the ghosts’ bodies. Next, use black felt or construction paper to cut out small circles for the eyes. You can also use a marker or googly eyes to add facial features. Finally, attach the string or twine to create a garland. These easy Halloween activities are perfect for getting your kids into the spooky season spirit. With these simple materials, you can create a fun and festive Halloween decoration that will bring joy and a touch of spookiness to your home.
Step-by-Step Garland Instructions
Create a spooky ghost garland by cutting white tissue paper or gauze into 15cm circles for the ghost bodies. Gather and twist the center, securing with string or a rubber band. Use black felt or construction paper for eyes and mouths, attaching them with glue or tape. Assemble the garland by tying ghosts at intervals along a twine. Hang the garland for a fun Halloween decoration.
Tips for Personalising Your Garlands
Personalising your spooky ghost garlands can make them even more special and unique. Here are a few tips to add a personal touch:
- Use Coloured Tissue Paper: While white is traditional for ghosts, using coloured tissue paper can give your garland a fun twist. Try orange, black, or even glow-in-the-dark paper for extra spookiness.
- Add Accessories: Give your ghosts some personality by adding small accessories like tiny hats, bows, or scarves. Use bits of felt, ribbon, or craft paper to create these items.
- Different Expressions: Instead of making all the ghosts identical, draw or cut out different facial expressions. Some can be happy, some can be scared, and some can be mischievous.
- Incorporate Lights: Weave a string of fairy lights through the garland to make it glow at night. This adds a magical touch to your Halloween decorations.
By customising your garlands, you can make this easy Halloween activity even more engaging and memorable for your family.
Pumpkin Painting Fun
Choosing the Right Pumpkins
Choosing the ideal pumpkins is essential for a successful pumpkin painting project. Opt for small to medium-sized pumpkins as they’re easier for kids to handle and paint. Smooth, even surfaces provide a better canvas; avoid pumpkins with deep ridges or too many bumps. Ensure they are firm and free from bruises or soft spots. Pumpkins with good stems last longer. For indoor decorations, consider mini pumpkins or gourds for added charm. Selecting the right pumpkins makes your Halloween painting projects fun and results in beautifully painted pumpkins.

Creative Painting Techniques
When it comes to pumpkin painting, the possibilities are endless. Here are some creative techniques to make your pumpkins stand out:
- Stencils and Templates: Use stencils or printable templates to create precise designs. Tape the stencil onto the pumpkin and paint inside the lines for a clean, professional look.
- Sponging and Dabbing: For a textured effect, use a sponge or a dabber to apply paint. This technique works great for creating a gradient or ombre look.
- Splatter Painting: If your kids love a bit of mess, try splatter painting. Dip a brush in paint and flick it onto the pumpkin for a fun, abstract design.
- Glow-in-the-Dark Paint: Add some spooky fun by using glow-in-the-dark paint. These pumpkins will come to life when the lights go out, adding an eerie glow to your Halloween display.
- Detail Brushes: Use fine detail brushes for intricate designs and patterns. This is perfect for adding small features like eyes, mouths, or decorative elements.
Using these techniques, you can turn your pumpkins into unique pieces of art, making this DIY Halloween project both fun and rewarding.
Displaying Your Painted Pumpkins
Showcase your beautifully painted pumpkins on your front porch to welcome trick-or-treaters with a burst of color. Arrange pumpkins of various sizes for an eye-catching display. Indoors, use them as festive centerpieces on dining tables, mantels, or window sills to add Halloween spirit to your home.
If using glow-in-the-dark paint, place pumpkins near light sources during the day so they glow at night. For a refined touch, use cake stands or decorative trays to elevate and group the pumpkins, adding dimension and interest to your display. Creative positioning enhances the overall Halloween atmosphere, making your pumpkins a delightful part of your spooky season decorations.
DIY Trick-or-Treat Bags
Simple Bag Designs
Creating personalized trick-or-treat bags is a fun Halloween activity for kids. Use sturdy canvas or fabric tote bags as a base. Decorate with fabric markers or paints by drawing Halloween symbols like pumpkins and bats. Alternatively, use felt cut-outs of witches’ hats or spiders, adding googly eyes or glitter for extra flair. Personalize further by adding the child’s name with puffy paint or iron-on letters. These projects make for creative family bonding, and kids will love showing off their unique bags on Halloween night.

Decorating Ideas for Bags
Decorating your DIY trick-or-treat bags is super fun and easy. Try glow-in-the-dark paint to make spooky designs that shine at night. You can also glue on sequins, beads, or rhinestones for some sparkle.
Use stamps and ink pads with Halloween themes like skulls, witches, or haunted houses for quick, cool designs.
For texture, add fabric patches or iron-on designs. Glue pom-poms or tassels to the handles for extra style.
You can also use natural items like dried leaves or small twigs, glued on for a cozy fall look. These ideas will help your kids create special and fun trick-or-treat bags for Halloween.
Making Bags Durable
To ensure your DIY trick-or-treat bags withstand Halloween night, choose high-quality materials like sturdy canvas or heavy-duty fabric. Reinforce handles by securely stitching them or doubling the fabric for added strength. Firmly attach decorative elements using fabric glue or sewing. Opt for permanent, water-resistant paints or markers to prevent smudging. Adding a fabric lining boosts durability and helps maintain shape. Ensure tight seams for reliability. Following these tips ensures your Halloween bags are fun, festive, and long-lasting.
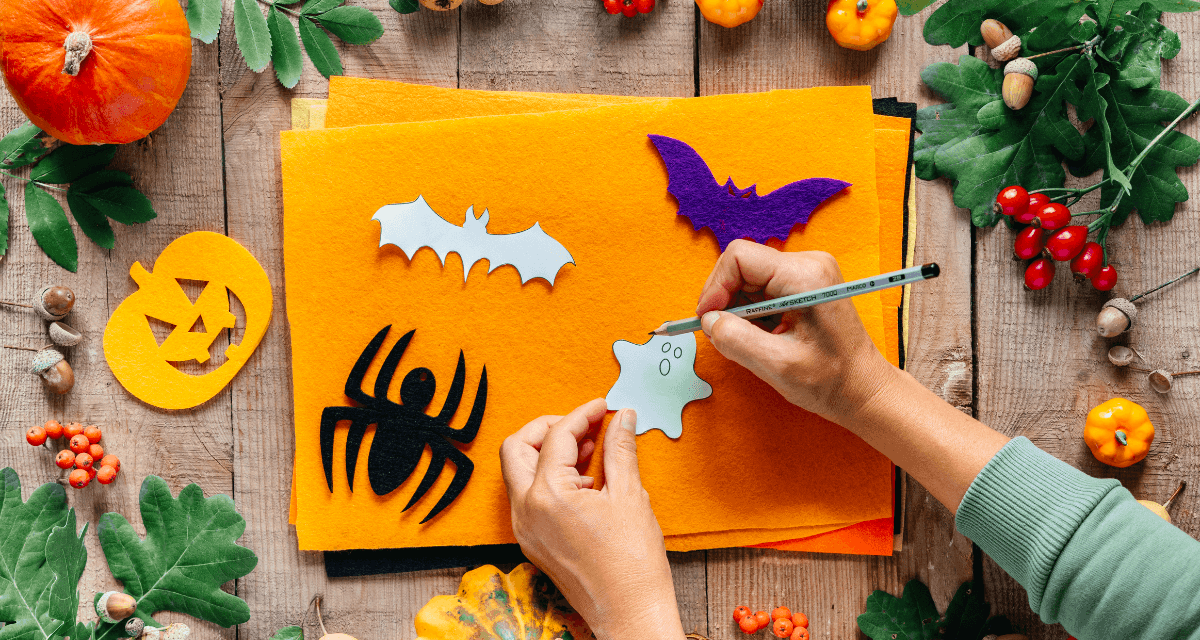
Creepy Crawly Spider Crafts
Easy Spider Materials
Crafting creepy crawlies is a fun way to engage kids during the spooky season. For easy spider crafts, you’ll need a few basic materials that are both inexpensive and easy to find. Here’s a list to get you started:
- Black construction paper or craft foam: This will serve as the spider’s body.
- Pipe cleaners: Black or any other dark colour pipe cleaners will work perfectly for creating the spider’s legs.
- Googly eyes: These add a fun and animated touch to your spiders.
- Glue or tape: Essential for sticking the parts together.
- Scissors: For cutting the construction paper or craft foam and pipe cleaners.
- Markers or paint: Optional, for adding details or patterns to your spiders.
With these simple materials, you can create an array of spooky spiders that are perfect for decorating your home. These easy Halloween activities are great for sparking creativity and adding a touch of fun to your Halloween celebrations.
Crafting Your Spooky Spiders
Making spooky spiders is a fun and easy craft for kids. Start by cutting a circle from black paper or foam for the spider’s body. Then, cut pipe cleaners into eight equal pieces for each spider’s legs. Bend the pipe cleaners to make them look more like real legs.
Attach the legs to the bottom of the spider’s body using glue or tape so they spread out evenly. Add googly eyes on top of the body to give your spider a face. Use markers or paint to add fun patterns or designs.
These simple Halloween crafts are great for the whole family. They’re not only fun to create but also make great decorations for Halloween parties or to give your home a spooky look. Use your imagination to see what kinds of spiders you can make!
Fun Ways to Use Your Spiders
Once your spooky spiders are crafted, there are countless fun ways to enhance your Halloween festivities. Hang them from the ceiling with thin thread to create a creepy illusion or scatter them across tables or mantels for a surprise. Use them in party games, such as scavenger hunts or as markers in hide-and-seek. For an educational twist, teach kids about real arachnids using the spiders. Personalize gifts by attaching a spider to Halloween treats or goody bags. These easy activities engage kids in crafting and add a spooky charm to your celebrations.
Haunted House Pop-Up Cards
Basic Card Materials
Creating haunted house pop-up cards is a fantastic way to add a personal touch to your Halloween greetings. To get started, you’ll need some basic materials:
- Cardstock or heavy paper: This will form the base of your card and ensure it’s sturdy enough to stand up.
- Coloured construction paper: Use different colours to create the various elements of your haunted house.
- Scissors: Essential for cutting out the shapes and designs.
- Glue or double-sided tape: To assemble the different parts of your pop-up card.
- Markers or coloured pencils: For adding details and personal touches to your designs.
- Ruler: To help with precise measurements and straight lines.
- Pencil: For sketching out your designs before cutting.
With these simple materials, you can create intricate and spooky pop-up cards that are sure to impress. These easy Halloween activities not only foster creativity but also provide a delightful way to share the spooky season with friends and family.

Step-by-Step Card Making
Making a haunted house pop-up card is easy and fun! First, fold a piece of cardstock in half to make the card base. Then, draw windows, doors, and spooky trees on colored paper and cut them out.
For the pop-up, fold a smaller cardstock piece in half. Cut two lines, 2cm apart, on the fold. Push the cut section inward to make a pop-up tab.
Attach your haunted house to the tab, so it pops up when the card opens. Stick other decorations around the house, inside and out.
Add spooky eyes or ghosts with markers or colored pencils. This simple Halloween craft makes a unique card, perfect for the spooky season.
Adding Spooky Touches
Make your haunted house pop-up cards extra spooky with these easy ideas. Add surprise with glow-in-the-dark stickers or paint. Sprinkle black glitter for a magical, eerie look.
Use cotton balls to make fog or cobwebs. Try small pieces of fabric or lace for floating ghost figures.
Layer different colored papers for shadows and depth, making the house look scarier. Draw bats, spiders, or bugs around the edges for a haunted feel.
Write spooky messages inside with a metallic pen. These simple touches make your cards special for the Halloween season.